Java is one of those languages that I have know about for a long time but never really had anything to do with. Recently though I started to look at the JME3 game engine which is Java and that prompted me to start this little project.
Landscape Generator
What I am considering here goes beyond just a tool to simply create a random heightmap, but for this part I am just going to cover the creation of a heightmap which will be the basis for the landscape and in future posts I will add features and functions aimed at creating the required data to (eventually) generate a game map using the data we output here and a set of premade models for vegetation and buildings, etc.
We will end up with a heightmap that looks something like this.
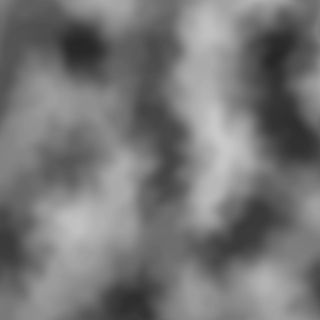 |
| Random Heightmap after perturbation, erosion and smoothing. |
So, let's get started. Fire up your java code editor or ide and start a new project.
( I am using Eclipse Luna )
Noise.
In order to generate a heightmap, we need some sort of noise generation algorithm. The most common one when searching for this sort of thing is Perlin noise. I did some investigation and considered writing a Perlin noise class but in the end I decided to use the excellent
OpenSimplexNoise class by Kurt Spencer
Click the link to get that class and import it into your project.
Note: I am not going to cover the basic java conventions such as package names and so on. I will leave that up to you.
Create a class. I named my class NoiseHeightmap because I intend to visit at least one other method of generating a heightmap in future posts.
public class NoiseHeightmap {
Then setup some variables we will use through the generation of the heightmap.
private long Seed = 0;
private int Size = 512;
private static double featureSize = 100; // for OpenSimplexNoise
private double[][] Heightmap;
private OpenSimplexNoise noise;
I setup the constructor to allow us to provide the size of the heightmap as well as a Seed value. Using a specified seed value would allow us to regenerate that same heightmap again if it was required.
public NoiseHeightmap(int size, long seed)
{
Size = size;
Seed = seed;
// Init height map array
Heightmap = new double[Size][Size];
// Init OpenSimplexNoise
noise = new OpenSimplexNoise(Seed);
We set the provided size and seed. Then we initialize the multidimensional array to store the height of each point of the height map. We also create a new instance of the OpenSimplexNoise class to provide the noise we will use.
Then proceed to generate the initial basic heightmap. To do this we need to loop through the Size twice. We need to populate every pixel of an image that is (Size * Size) (e.g. 512 pixels x 512 pixels).
// Generate base height map from noise
for( int y = 0; y < Size; y++ )
{
for( int x = 0; x < Size; x++ )
{
Heightmap[x][y] = noise.eval(x / featureSize, y / featureSize, 0.0);
}
}
At that point, we have a heightmap. We are dividing by the featureSize value in order to lower the frequency of the noise, meaning we get more rolling hills rather than high frequency noise.
OpenSimplexNoise outputs noise as double from -1 to 1. Which means we have an array of values that could be anywhere between -1 and 1. This isn't really much good if we wanted to output it to an image or use in game. If we saved the data as an image now we'd get something like this.
 |
| Our heightmap prior to being normalized. |
 |
| The same heightmap after the normalization was done. |
In order to make it resemble a normal heightmap and make it useful we will need to
normalize the data. I will show the function to normalize the data soon but before we do that we want to add some more features to make the heightmap more realistic.
Perturb
This step displaces the height elements according to another noise map with a much higher frequency. This makes the map more rough and lessens the smooth rolling hills a bit. Making the "mountains" a bit more random.
private void Perturb(double f, double d)
{
int u, v;
double temp[][] = new double[Size][Size];
for( int i = 0; i < Size; ++i )
{
for( int j = 0; j < Size; ++j)
{
u = i + (int)(noise.eval(f * i / (double)Size, f * j / (double)Size, 0) * d);
v = j + (int)(noise.eval(f * i / (double)Size, f * j / (double)Size, 1) * d);
if (u < 0) { u = 0; }
if (u >= Size) { u = Size - 1; }
if (v < 0) { v = 0; }
if (v >= Size) { v = Size - 1; }
temp[i][j] = Heightmap[u][v];
}
}
Heightmap = temp;
}
Lets look at the same heightmap again after we run the Perturb(16,16) function. Providing different arguments will provide different effects and so you can adjust to suit your project.
 |
| After running Perturb(16,16) and normalizing. |
Next up we will do some very simple erosion on the heightmap. What this function does is go through every elements Moore neighbourhood
(excluding itself) and look for the lowest point, the match. If the
difference between the element and its match is between 0 and a
smoothness factor, some of the height will be transferred.
The following function needs to be called multiple times to increase the effect.
private void Erode(double smoothness)
{
for( int i = 1; i < Size - 1; i++ )
{
for( int j = 1; j < Size - 1; j++)
{
double d_max = 0.0f;
int match[] = { 0, 0 };
for (int u = -1; u <= 1; u++)
{
for (int v = -1; v <= 1; v++)
{
if(Math.abs(u) + Math.abs(v) > 0)
{
double d_i = Heightmap[i][j] - Heightmap[i + u][j + v];
if (d_i > d_max)
{
d_max = d_i;
match[0] = u;
match[1] = v;
}
}
}
}
if(0 < d_max && d_max <= (smoothness / (double)Size))
{
double d_h = 0.5f * d_max;
Heightmap[i][j] -= d_h;
Heightmap[i + match[0]][j + match[1]] += d_h;
}
}
}
}
Lets have a look at that same heightmap again after 50 passes of Erode(18).
NOTE: 50 passes of Erode(18) could very well be too strong to be much use, I did it for this to clearly see the difference it make on the heightmap.
 |
| Same heightmap after 50 x Erode(18) |
You should be able to see the layers created on the steeper sections. As I said above, 50 passes of Erode(18) might be too much. Adjust according to need. Keeping in mind that our last step (before normalizing) is to smooth it out a bit.
private void Smoothen()
{
for( int i = 1; i < Size - 1; ++i )
{
for( int j = 1; j < Size - 1; ++j)
{
double total = 0.0;
for (int u = -1; u <= 1; u++)
{
for (int v = -1; v <= 1; v++)
{
total += Heightmap[i + u][j + v];
}
}
Heightmap[i][j] = total / 9.0;
}
}
}
We call Smoothen once after we're finished doing the erosion in order to smooth it out a little.
This is what it looks like after being smoothed. (because our erosion was strong the smoothing is only slight, almost like a soft blur)
 |
| After smoothing |
Finally we get to the normalizing.
The reason we leave normalizing to the end is that it is possible (using non-normalized data) to create multiple heightmaps that join together into a seamless and much larger terrain. I won't cover that here, but maybe will touch on it later in the series of tutorials. But to output the heightmap to a usable image at last we first need to normalize it.
Here is the normalize function.
private void Normalize()
{
for( int y = 0; y < Size; y++ )
{
for( int x = 0; x < Size; x++ )
{
Heightmap[x][y] = (Heightmap[x][y] - -1) / (1 - -1);
}
}
}
We're basically looping through each point and converting it's height to an equivalent height within the range of 0 - 1
New height = (current_height - min height) / (max height - min height)
I already mentioned the OpenSimplexNoise we're using produces values between -1 and 1, so the conversion seen above should normalize that back to 0-1.
By the end, the constructor function should look something like this.
public NoiseHeightmap(int size, long seed)
{
Size = size;
Seed = seed;
// Init height map array
Heightmap = new double[Size][Size];
// Init OpenSimplexNoise
noise = new OpenSimplexNoise(Seed);
// Generate base height map from noise
for( int y = 0; y < Size; y++ )
{
for( int x = 0; x < Size; x++ )
{
Heightmap[x][y] = noise.eval(x / featureSize, y / featureSize, 0.0);
}
}
// Perturb
Perturb(16,16);
// Erode
for( int i = 0; i < 50; i++ )
{
Erode(18.0);
}
// Smoothen
Smoothen();
// Normalise
Normalise();
}
I also had a LandscapeGenerator Class which has the main() function and within that I call the NoiseHeightmap class to generate the heightmap.
To output the heightmap to a PNG image for use in a rendering engine you can do so with the function like this. (NOTE: Ensure you normalize the heightmap before saving it as an image.
public void HeightmapPNG(double[][] data, String filename) throws IOException
{
int size = data[0].length;
BufferedImage image = new BufferedImage(size, size, BufferedImage.TYPE_INT_RGB);
for (int y = 0; y < size; y++)
{
for (int x = 0; x < size; x++)
{
double value = data[x][y];
int rgb = 0x010101 * (int)(255 * value);
image.setRGB(x, y, rgb);
}
}
ImageIO.write(image, "png", new File(filename));
}
I've implemented this in a seperate Output class which will be extended upon to provide functions to output the other data we will generate in the next parts of the tutorial.
In Part 2 I will look at creating a "steepness" mask which will provide us with an easy way to determine flat areas for vegetation and buildings. I will also look at generating a "splat-map" for the JMonkeyEngine terrain texture splatting. We'll also look at what the terrain looks like when rendered using the heightmap and texture splat map.
In Part 3 I intend to look at the generation of rivers and maybe lakes as well as roads.
Stay tuned for more coming soon.
(The algorithms here are converted to Java by myself and based on the c++ turorial from float4x4.net)


